How to Set Up Domain Name Forwarding for Your Website
Domain name forwarding is an essential tool for website owners. It allows you to redirect visitors from one domain to another, ensuring seamless access to your website. Whether you’re consolidating multiple domain names, rebranding, or simplifying URLs, domain forwarding is a straightforward way to guide users to the correct destination.
In this guide, we’ll walk you through the steps to set up domain name forwarding and explain why it’s a valuable strategy for your website.
What is Domain Name Forwarding?
Domain name forwarding, also known as URL forwarding, is a feature provided by domain registrars that lets you redirect one domain name to another. For example, if you own example.net, you can forward it to example.com, so visitors entering either address land on the same website.
This process is particularly useful for:
- Rebranding: Redirecting an old domain to a new one during a business name change.
- Securing Multiple Domains: Ensuring all variations of your domain (e.g., .com, .net, .org) point to the same site.
- Shortened URLs: Redirecting a long or complex URL to a shorter, more memorable one.
Types of Domain Forwarding
Before setting up domain forwarding, it’s important to understand the two main types:
1. Permanent Forwarding (301 Redirect)
This type of forwarding is used for permanent changes, such as rebranding. A 301 redirect tells search engines that the original domain has been permanently moved to the new one, preserving SEO value and rankings.
2. Temporary Forwarding (302 Redirect)
This is ideal for temporary changes, such as when your website is under maintenance. A 302 redirect tells search engines that the move is temporary and that the original domain may still be relevant in the future.
How to Set Up Domain Name Forwarding
Setting up domain forwarding is a simple process that varies slightly depending on your domain registrar. Below is a general guide that applies to most registrars.
Step 1: Log In to Your Domain Registrar Account
- Go to the website of your domain registrar (e.g., GoDaddy, Namecheap, Google Domains).
- Log in to your account using your credentials.

Step 2: Access Domain Settings
- Navigate to the Domain Management or My Domains section.
- Select the domain name you wish to forward.
Step 3: Choose the Forwarding Option
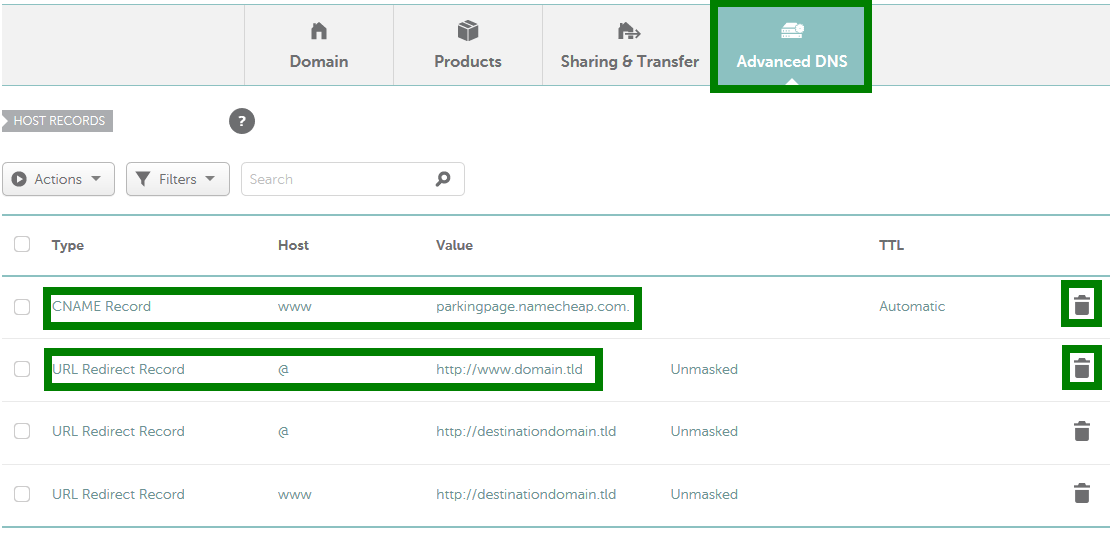
- Look for an option labeled Domain Forwarding, Forward this Domain, or URL Redirects.
- Click on the option to configure forwarding settings.
Step 4: Enter the Destination URL
- In the forwarding settings, enter the URL of the destination website (e.g., https://example.com).
- Double-check the URL for accuracy to avoid misdirecting visitors.
Step 5: Select Forwarding Type
- Choose between Permanent (301) or Temporary (302) forwarding, depending on your needs.
- Some registrars may also offer masking, which hides the destination URL and shows the forwarded domain in the browser address bar.
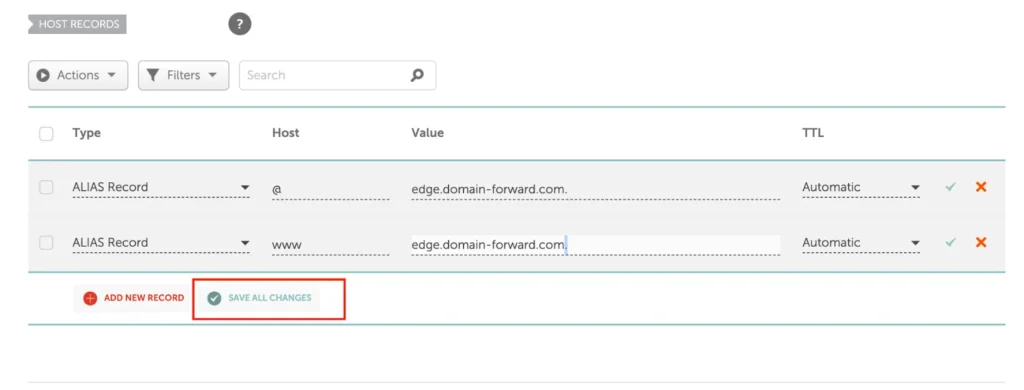
Step 6: Save and Test the Changes
- Save the forwarding settings and allow some time for the changes to propagate (this can take up to 24 hours).
- Test the domain by entering it in a browser to ensure it redirects correctly to the destination URL.
Best Practices for Domain Name Forwarding
To ensure successful domain forwarding, follow these tips:
1. Use Permanent Forwarding for Long-Term Changes
A 301 redirect is the best option for permanent changes because it transfers SEO value from the old domain to the new one. This ensures that your website maintains its search engine rankings and traffic.
2. Avoid Masking When Possible
While masking hides the destination URL, it can confuse users and negatively affect SEO. Search engines may view masked URLs as duplicate content, which can hurt your website’s ranking.
3. Monitor Forwarding Results
Regularly check your domain forwarding to ensure it continues to work correctly. Use tools like Google Analytics to track traffic and confirm visitors are landing on the intended destination.
4. Update Backlinks
If you’re redirecting a domain with backlinks, update those links to point directly to the new URL whenever possible. This ensures that link authority is preserved.
5. Notify Users and Clients
If you’re making a major domain change, notify your users, clients, or subscribers about the change to avoid confusion.
Common Uses of Domain Forwarding
Domain forwarding can be applied in various scenarios, including:
- Rebranding a Website: Redirecting an old domain to a newly branded website.
- Multiple Domain Ownership: Ensuring all variations of your domain (.com, .net, .org) lead to your main site.
- Event Promotions: Using a memorable domain name to redirect visitors to a specific event page.
- Affiliate Marketing: Redirecting a domain to an affiliate URL for promotions.
Conclusion
Domain name forwarding is a powerful and user-friendly feature that can help streamline your online presence. By redirecting visitors to the correct URL, you ensure a consistent experience and safeguard your website’s SEO value. Whether you’re rebranding, simplifying access, or managing multiple domains, following this guide will make the setup process smooth and efficient.
Take control of your domains today and leverage forwarding to enhance your website’s functionality and user experience.


